
Sub-Total: $0.00
The Double Feed Method: My Sourdough Starter Prep Routine
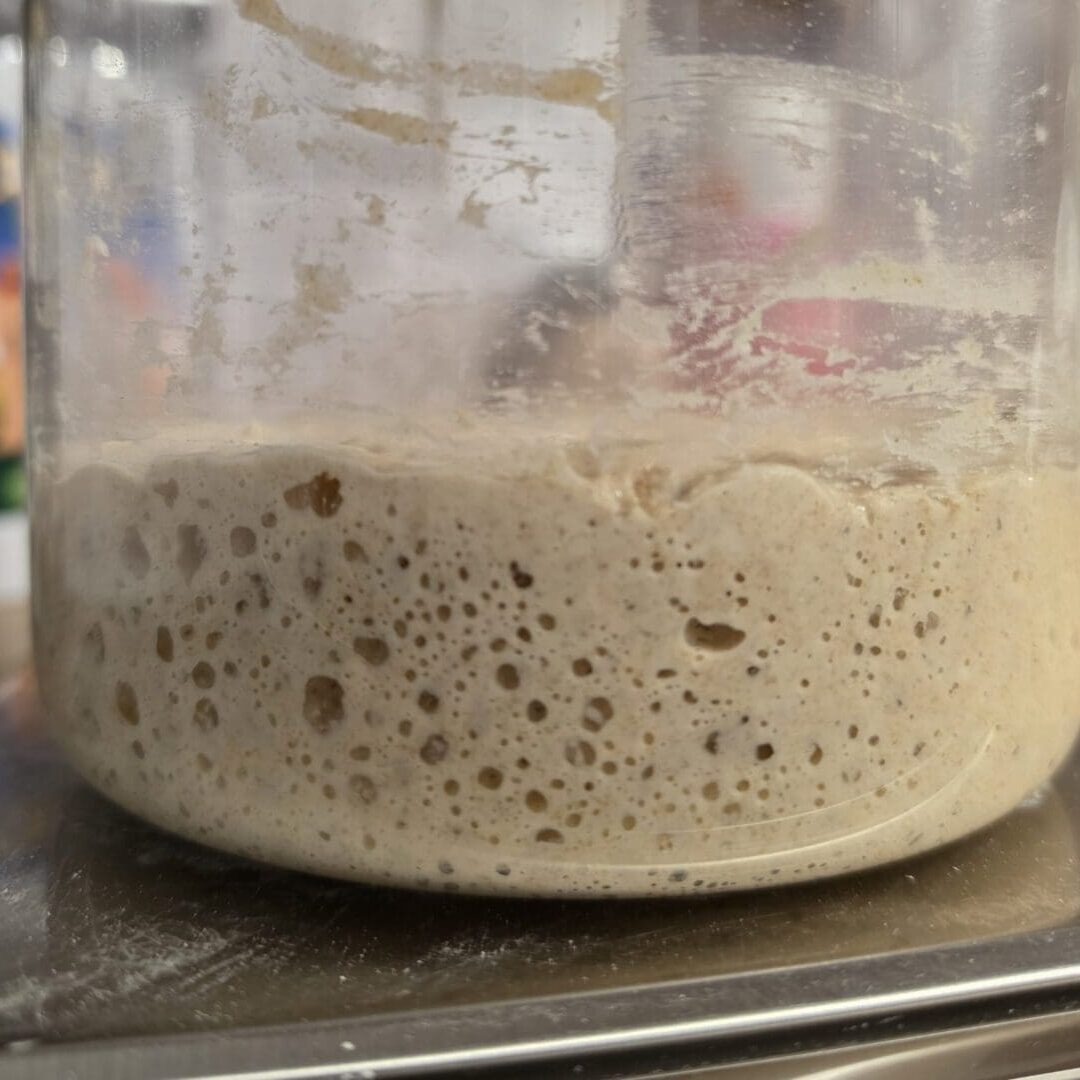
The Double Feed Sourdough Method
If there is one thing I’ve learned after baking thousands of loaves of sourdough, it’s that a strong, active starter makes everything easier.
Better fermentation, better dough strength, better rise, more predictable timing…
And fewer moments where you’re staring at a bowl of dough wondering, “What the heck happened?” 😂
I’ve tried a lot of different ways of feeding and maintaining sourdough starter over the years, but one method consistently gives me the results I want:
I feed my starter twice, in the same day, before I mix my dough the next morning.
I call it my Double Feed Method.
It’s my sourdough starter prep routine for getting an active starter bulked up and ready to make amazing bread!
And here’s the part that makes it different:
I don’t discard between the two feedings.
Instead, I start with a deliberately small amount of starter, give it a 1:1:1 feeding, let it become active, and then use that entire amount for my next larger 1:4:4 feeding.
The result is a large, bubbly, active starter that’s ready to use the next morning — without throwing away part of the starter I just built.
And yes, this works whether you’re making 60 loaves or just two.
In this post, I’m going to show you exactly how I do it, the math behind it, why I use these two feeding ratios, how I use it with refrigerated starter, and what is actually happening inside your starter during the process.
What Is the Double Feed Sourdough Method?
The Double Feed Method is simply a two-step feeding process I use to prepare my sourdough starter before mixing dough.
It isn’t how I maintain my starter every day.
It’s how I build the amount of active starter I need for baking.
The basic process looks like this:
☀️ First Feeding
Start with a small amount of established starter and give it a 1:1:1 feeding.
Let it rise for several hours and become active.
🌙 Second Feeding
Use the entire amount from the first feeding for my next larger 1:4:4 feeding.
No discard.
Let that build and rise overnight.
🌅 Next Morning
You have an active, bubbly starter ready to mix into your dough.
That’s the entire concept:
Start small → feed → keep it all → feed again → mix dough.
The ratios are based on weight, so you’ll want to use a digital kitchen scale rather than measuring with cups.
Why I Started Feeding My Starter Twice Before Mixing Dough
I actually didn’t learn this method from another sourdough recipe or book.
I kind of fell into it.
When I first started baking regularly, I was feeding my starter once a day. I would give it a larger feeding — something like 1:4:4 or 1:5:5 — and then leave it alone until the next day.
That worked.
But I noticed something over time.
My starter seemed to lose some of its strength as the week went on.
It would still bubble and rise and look like a perfectly healthy starter.
But when it came time to bake, it just didn’t seem to have the same fermentation power.
So I started experimenting.
Instead of one large feeding, I tried giving it a smaller feeding earlier in the day and then feeding it again that evening before I needed it.
And the difference in my starter was noticeable.
It became much more active and predictable.
So I kept doing it.
Eventually, this became part of my regular baking routine — and the Double Feed Method was born.
How the Double Feed Sourdough Starter Math Works
Once you understand the basic idea, the math is actually pretty simple.
I work backward from the amount of starter I need for my dough.
My second feeding is a 1:4:4 ratio:
1 part starter + 4 parts flour + 4 parts water
That gives us 9 total parts.
So if I know how much starter I need, I can figure out exactly how much starter, flour, and water go into that final feeding.
Important Note👉 I Always Build in a Little Extra
One thing I always account for is a little extra starter. I don’t want to use every last gram in my dough and then have nothing left to feed for my next bake. 😂
I typically build at least 100g more starter than I need for my dough. That’s my little safety cushion and gives me enough to feed and continue my starter after baking.
If I’m having a really big bakery day—or I know I may need to add more dough to the schedule—I’ll often build 200–300g extra instead.
So when I say I need 2,250g of starter, It’s actually (2,150g + 100g extra). The amount I need for my dough + my extra starter is my true target for the final build.
Let’s say I need 2,250g of starter.
First:
2,250 ÷ 9 = 250g
That tells me I need approximately 250g of starter going into my second feeding.
Then:
250 × 4 = 1,000g flour
250 × 4 = 1,000g water
So my second feeding is:
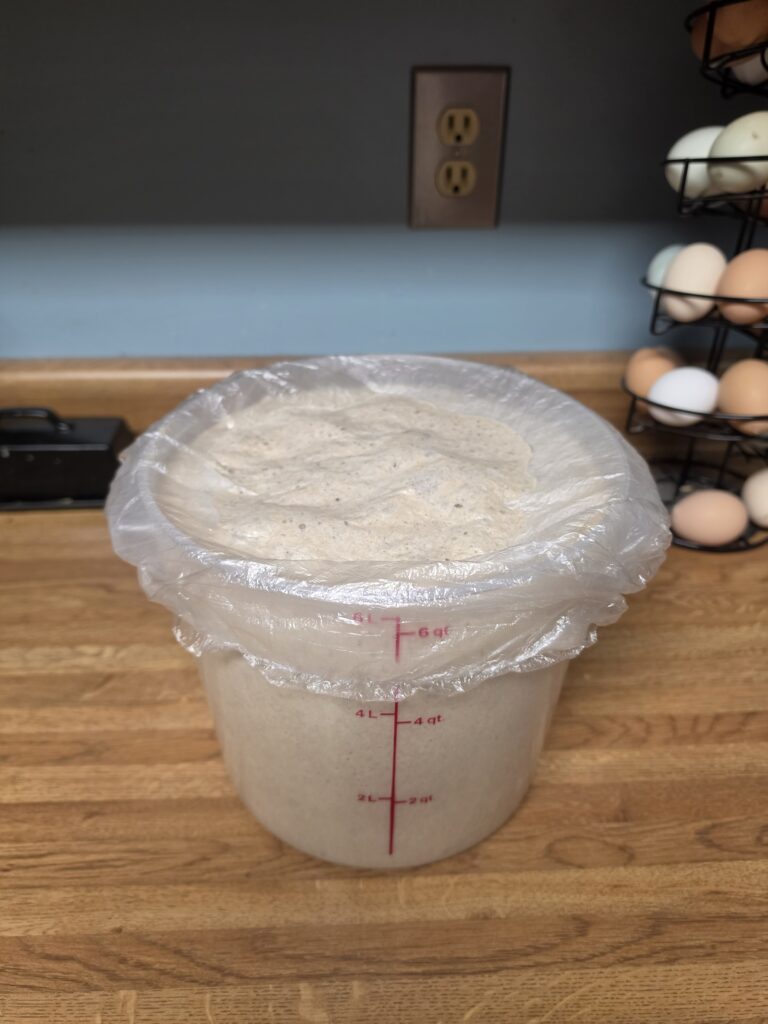
250g starter + 1,000g flour + 1,000g water = 2,250g starter
But here’s the important part:
I don’t need to already have 250g of starter.
I build that amount with my first feeding.
Since the first feeding is 1:1:1, I can use approximately:
83g starter + 83g flour + 83g water = 249g
That’s close enough to my 250g target for practical baking purposes.
And I don’t discard any of it.
I use that entire first feeding in the second feeding.
So the process looks like:
83g starter → 249g starter → ~2,250g starter
That’s how I can start with a relatively small amount of established starter and build exactly what I need.
What if I’m only baking a few loaves?
Same math.
Let’s say you need 270g of starter.
270 ÷ 9 = 30g
So you need approximately 30g going into the second feeding.
To build that amount with your first feeding:
10g starter + 10g flour + 10g water = 30g
Then:
30g starter + 120g flour + 120g water = 270g
So:
10g → 30g → 270g
That’s the Double Feed Method in its simplest form.
You don’t need to maintain a huge jar of starter just because you’re planning to mix dough tomorrow.
You can start small and build exactly what you need.
Double Feed Options for Small to Large Batches
Here’s what that looks like at different batch sizes:
| Starter Needed | First Feeding | Second Feeding | Final Amount |
|---|---|---|---|
| 270g | 10g + 10g + 10g | 30g + 120g + 120g | 270g |
| 450g | 17g + 17g + 17g | 50g + 200g + 200g | 450g |
| 900g | 33g + 33g + 33g | 100g + 400g + 400g | 900g |
| 1,350g | 50g + 50g + 50g | 150g + 600g + 600g | 1,350g |
| 1,800g | 67g + 67g + 67g | 200g + 800g + 800g | 1,800g |
| 2,250g | 83g + 83g + 83g | 250g + 1,000g + 1,000g | 2,250g |
| 2,700g | 100g + 100g + 100g | 300g + 1,200g + 1,200g | 2,700g |
The numbers in each feeding are always listed as starter + flour + water. They don’t have to be perfectly exact to the gram. The important thing is understanding the ratios and knowing how to work backward from the amount of starter you actually need.
💡 Remember: These examples show the amount of starter needed for your dough + extra for re-feeding. I personally always build at least 100g extra so I have enough left to feed and maintain my starter after mixing. For larger bakery days, I may build in 200–300g extra.
Don’t Want to Do the Math? 😂
If you’re looking at those numbers thinking:
“Kristi, I appreciate the math lesson, but absolutely not.”
I get it. 😂
That’s actually why I made my Double Feed Sourdough Starter Calculator.
It’s a simple excel product where you enter how much starter you need for your recipe, and it does the math for you.
It calculates your two feedings, including:
- How much starter to use
- How much flour to add
- How much water to add
- Your total starter
- Your feeding times based on when you plan to mix your dough
I automatically start with 100g of extra starter in the calculator, but you can increase that amount if you’re making a larger batch or want a bigger cushion to make sure you have starter left to re-feed.
So whether you’re making enough starter for two loaves or dozens of loaves, you don’t have to do the math yourself.
👉 Get the Double Feed Sourdough Starter Calculator
• Instant digital download •
Why I Start Small Instead of Discarding
This is really the heart of the method.
Traditional starter maintenance often looks something like:
Keep a certain amount → discard a portion → feed what remains.
That’s a perfectly valid way to maintain a sourdough starter.
But I’m not trying to maintain a huge amount of starter between bakes.
I’m building the amount I need when I need it.
If I need 270g tomorrow, I don’t need to maintain 270g today.
I only need 30g before my final feeding.
And before that, I only need 10g.
10g → 30g → 270g
I’m scaling the culture up instead of maintaining a large quantity and throwing a portion away before feeding it again.
That’s what makes the no-discard part of this method possible.
What’s Actually Happening Inside Your Starter? 🤓
Now let’s get a little nerdy.
Because sourdough is a lot more interesting than just “yeast + flour + water.”
A mature sourdough starter is a living microbial community made up primarily of yeasts and lactic acid bacteria, along with other microorganisms that may be present depending on the starter and its environment.
The yeast produces carbon dioxide, which contributes to leavening.
The bacteria produce acids and other fermentation products that contribute to flavor and help shape the fermentation environment.
And that microbial community is influenced by things like:
- Flour
- Feeding schedule
- Temperature
- Hydration
- Environment
- The history of the starter
So when we’re feeding starter, we’re not simply “feeding yeast.”
We’re managing a living fermentation ecosystem.
And this is where feeding ratios matter.
A feeding ratio changes how much fresh flour and water are being added relative to the amount of existing starter.
That changes the fermentation conditions and influences how quickly the starter moves toward peak activity.
Generally, a smaller feeding ratio such as 1:1:1 ferments more quickly, while a larger ratio such as 1:4:4 generally takes longer to peak under the same conditions.
That’s exactly what I use to my advantage in this method.
Here’s What I Think Is So Interesting About the Double Feed
When you do a traditional discard-and-feed routine, you’re removing some of the existing culture before adding fresh food.
And here’s something important:
You don’t know exactly what you’re removing.
You can’t look at your jar and say:
“This spoonful contains exactly 42% of my yeast population and 58% of my bacteria.” 😂
You don’t know.
Microorganisms are distributed throughout the starter, and the composition isn’t something you can determine just by looking at it.
So when you discard a portion, you’re removing some portion of the microbial community, but you don’t know precisely which organisms or how many you’re removing.
That doesn’t make discarding bad.
It simply means discarding isn’t a precision measurement of your microbial population.
Why 1:1:1 First and 1:4:4 Second?
The two feedings have different jobs.
1:1:1 — My Quick Refresh
The first feeding gives a relatively small amount of established starter fresh flour and water.
Because the amount of new food is smaller relative to the amount of starter being carried forward, it tends to ferment more quickly.
For my schedule, this is the part that gets my starter moving and active during the day.
1:4:4 — My Overnight Build
The second feeding uses that active starter and gives it a much larger amount of fresh flour and water.
Because there is less starter relative to the amount of fresh food, fermentation generally takes longer.
That’s why 1:4:4 works so well for my overnight schedule.
I like to think of it simply as:
1:1:1 gets it going.
1:4:4 builds what I need.
And that’s really all you need to remember.
The Timing: When Do I Feed?
My typical schedule looks like this:
☀️ 10–11 AM
First feeding
I do my 1:1:1 feeding and let it ferment for several hours.
🌙 6–8 PM
Second feeding
I make my larger 1:4:4 build.
I generally time this so the starter has around 12 hours before I plan to mix my dough the next morning.
🌅 The Next Morning
Mix your dough. If you’re looking for a simple recipe to use with your freshly prepared starter, check out my Simple Farmhouse Sourdough Bread Recipe.
The starter should be active, bubbly, expanded, and ready to use.
But don’t get too hung up on the clock.
Your starter doesn’t own a watch. 😂
Temperature, flour, starter maturity, hydration, and your individual culture can all affect fermentation speed.
So use the timing as a guide — not a rule.
What If My Kitchen Is Warm?
This is where you may need to adjust your feeding ratio.
A 1:4:4 feeding is my normal overnight build, but if your kitchen is particularly warm, your starter may move faster than mine.
If that’s happening, you can experiment with a larger ratio, such as:
1:5:5
The general principle is:
More fresh food relative to the amount of starter = generally longer fermentation time.
So a larger feeding ratio can be useful when you’re trying to stretch the time between feeding and peak activity.
Don’t blindly follow my timing if your kitchen is 80–85°F and mine is sitting at a completely different temperature.
Watch your starter.
Using the Double Feed Method With a Refrigerated Sourdough Starter
This is something I really want to emphasize because I get asked about it all the time.
Your starter does NOT have to live on the counter for this method to work.
If you normally keep your starter in the refrigerator, the Double Feed Method can be a great way to prepare it for baking.
You don’t need to pull your entire refrigerated jar out and feed the whole thing.
Instead, take a small amount and use that as the starting point for your double feed.
Give it the first feeding and allow it to become active. Then use the entire amount for your larger second feeding before letting it rise overnight.
This is one of my favorite uses for the method because you’re essentially giving a chilled starter two opportunities to become active before you ask it to raise your dough.
I’ve had readers ask what to do when their starter has been sitting in the refrigerator for weeks or they’ve taken a break from baking.
My approach is still the same:
Start small and build it back up.
You don’t need to maintain a huge jar just to keep your starter alive between bakes.
Need a sourdough starter to get started? 🥖 If you don’t have an established starter yet, you can grab my 👉 Organic Dehydrated Sourdough Starter and get your own starter going at home. Once it’s established, the Double Feed Method is an easy way to prepare it for baking day!
What Your Starter Should Look Like
Don’t rely on the clock alone.
When your starter is ready to use, you’re looking for clear signs of active fermentation. You may see:
✔ Lots of bubbles throughout the starter
✔ Noticeable expansion
✔ An airy, almost mousse-like texture
✔ A rounded or slightly domed top at its highest point
✔ A starter that looks alive and active rather than dense and flat
For my 1:4:4 overnight feeding, I generally plan for around 12 hours, but your starter may be faster or slower. That’s completely normal.
Don’t Feel Like You Have to Catch It at Peak
Here’s something I think is important: I don’t actually like to use my starter right at its absolute peak.
Think about it this way: your starter just had a nice big meal. At peak, it’s essentially at the high point of that feeding. I prefer to let it go just a little beyond that point and begin to fall before I use it in my dough.
Look for the high-water mark on your jar where your starter reached its highest point. Once you see it starting to fall slightly, that’s a great time to use it.
And don’t worry if you’ve missed that window by a little bit. I’ve used my starter even after it had fallen several inches, and it still performed beautifully.
If I had to choose, I’d rather use my starter after peak than before peak.
The important thing is that your starter has gone through an active fermentation and is still lively and bubbly—not that you catch it at one exact moment on the clock.
Your flour, temperature, starter maturity, hydration, and feeding ratio all play a role in how quickly your starter moves through this process.
What If My Starter Isn’t Ready After 12 Hours?
Don’t panic. 😊
12 hours isn’t a magic timer.
If your starter is still rising, it may simply need more time.
Things that can slow it down include:
- A cool kitchen
- A recently refrigerated starter
- A young or weaker starter
- Different flour
- Colder water
- A larger feeding ratio
And the opposite is true, too.
A warm kitchen can make your starter move much faster, so you may find that yours reaches peak activity well before mine does.
Learn your starter instead of forcing it to follow someone else’s clock.
Your starter will tell you when it’s ready—you just have to learn how to read it. 🥖
Final Thoughts: This Is My Method
The Double Feed Method isn’t something I started doing because I read that everyone should feed their starter this way.
I actually did the opposite.
I noticed that my starter wasn’t performing the way I wanted it to.
So I changed my feeding routine.
I started small.
I fed it twice.
I stopped discarding between those two feedings.
And I started working backward from how much starter I actually needed.
Over time, I noticed a pretty dramatic difference in how active and predictable my starter became.
That’s why I still use this method today.
And that’s really the philosophy behind a lot of what I teach about sourdough:
You don’t always need a more complicated process. Sometimes you just need to understand what you’re trying to accomplish and work from there.
If you’ve been struggling with a sluggish starter, especially one that’s been sitting in the refrigerator, give the Double Feed Method a try.
Start small.
Build it up.
Watch your starter.
And let the fermentation tell you when it’s ready.
Your starter doesn’t own a watch. 😂🥖
FAQ
What is the Double Feed Method for sourdough starter?
The Double Feed Method is a two-step feeding process I use to prepare my starter for baking. I start with a small amount of established starter, give it a first feeding, and then use the entire amount to make a larger second feeding before mixing dough.
Do I have to discard between the two feedings?
No. That’s one of the defining parts of my Double Feed Method. I start with a small amount of starter so I can use the entire first feeding in the second feeding without needing to discard.
Can I use the Double Feed Method with sourdough starter from the refrigerator?
Yes. This is one of my favorite ways to use it. Start with a small amount of refrigerated starter, give it the first feeding, allow it to become active, and then use the entire amount for the second feeding before baking.
Can I use this method if I only bake one or two loaves?
Absolutely. You can start with as little as 10g of starter and build exactly the amount you need.
For example:
10g → 30g → 270g
How much extra starter should I build?
I recommend building at least 100g more starter than you need for your dough. This gives you enough starter to keep and feed for your next bake instead of using every last bit in your dough.
For larger bakery days, I may build 200–300g extra if I think I might need to make additional dough or want a larger safety cushion.
My Double Feed Calculator automatically starts with 100g of extra starter, and you can increase that amount if you need more.
How long does the second feeding take to peak?
For my starter and typical kitchen conditions, the 1:4:4 overnight feeding generally takes around 12 hours. Your timing may be different depending on temperature, flour, starter maturity, and other conditions.
What if my kitchen is warm?
Your starter may ferment faster. You can experiment with a larger feeding ratio, such as 1:5:5, to give yourself a longer fermentation window.
Does the Double Feed Method guarantee a stronger starter?
No method can guarantee the same result for every starter.
A sourdough starter is a living microbial community that responds to its flour, temperature, feeding schedule, environment, and history.
The Double Feed Method is the process that has consistently given me an active and predictable starter for my baking schedule — which is why I continue to use it and teach it.
Continue Your Sourdough Journey
👉Simple Farmhouse Sourdough Bread Recipe (Beginner-Friendly + Digestible)
Learn the full beginner-friendly process for mixing, fermenting, shaping, and baking sourdough bread.
👉 How to Get a Better Rise in Sourdough Bread
Discover the simple changes that can dramatically improve oven spring, loaf height, and crumb structure—without changing your recipe.
👉How to Care for a Sourdough Starter
Feeding, Maintaining, and Preparing It for Baking
Have a question or want to share your experience?
I’d love to hear from you! ❤️ If you try the Double Feed Method, have a question about the process, or have your own sourdough tips or experience to share, leave a comment below.
I read every comment, and your questions often help me know what I should explain next! 🥖👇
Tags: Education

Leave a Comment