
Sub-Total: $0.00
Sourdough Focaccia
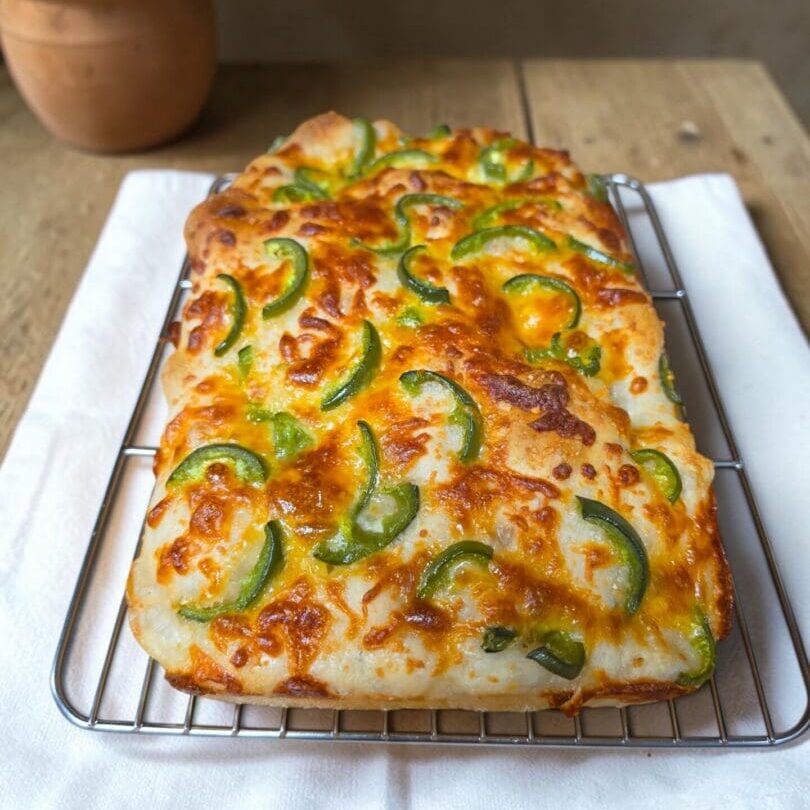
This sourdough focaccia is soft, bubbly, and full of flavor with a crispy, olive-oil-coated bottom. It’s one of those recipes that looks impressive but is actually really simple to make.
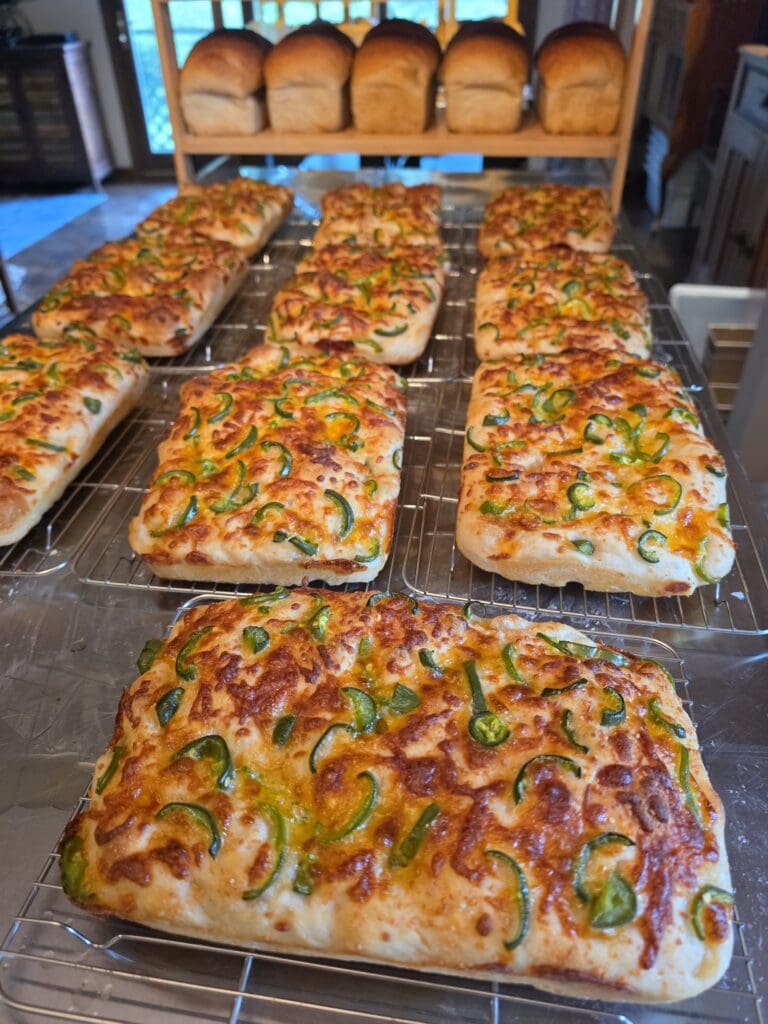
This recipe makes two 7 x 11-inch focaccias, making it perfect for sharing—or keeping both for yourself! 😅 The dough is pretty wet when you first mix it, but don’t let that worry you. A few sets of stretch and folds will help develop the dough and bring everything together. Focaccia is naturally a higher-hydration dough, so don’t expect it to feel like a typical bread dough.
The best part? This recipe goes straight from the refrigerator into the pans the next day, so most of the work is done ahead of time.
Why I Cold Proof My Focaccia
I like to let this dough spend the night in the refrigerator before dividing it into the pans. The cold proof gives the dough additional time to ferment and develop flavor while also making the dough much easier to handle the next day. It also makes this recipe incredibly convenient—you can do the mixing and fermentation one day, then finish and bake your focaccia the next or even the day after that.
Ingredients
For the dough
- 50 g active sourdough starter
- 20 g honey
- 375 g water
- 500 g flour
- 9 g salt
For the pans
- 40 g olive oil, divided between two pans (20 g per pan)
Toppings
Choose whatever toppings you love! Some of my favorites include:
- Four-cheese blend
- Garlic powder
- Fresh or dried herbs
- Tomatoes
- Olives
- Onions
- Roasted garlic
- Fresh vegetables
You can even make this into a sweet focaccia! Try cinnamon and sugar or another sweet topping combination. For a sweet version, I would also swap the olive oil for a more neutral oil, such as avocado oil.
Instructions
1. Mix the dough
Add the sourdough starter, honey, water, flour, and salt to a bowl or dough container.
Mix until all of the ingredients are fully incorporated.
Don’t worry if the dough seems extremely wet at this point. It will come together as you develop the dough with stretch and folds.
Need to get your starter ready for baking? I use my double-feed method when I need a predictable, bubbly starter at the right time. If you want to take the guesswork out of figuring out your feedings, check out my Double-Feed Sourdough Starter Calculator.
2. Stretch and folds
Over the next couple of hours, perform 3–4 sets of stretch and folds, approximately 30 minutes apart.
To stretch and fold, grab one side of the dough, gently stretch it upward, and fold it over itself. Rotate the container and repeat until you’ve worked your way around the dough.
With each set, you should notice the dough becoming stronger and more cohesive.
3. Bulk ferment
Your total bulk fermentation time is approximately 5–6 hours, including the time spent doing your stretch and folds.
After mixing your dough and completing the stretch and fold, leave the dough undisturbed to continue fermenting.
The exact timing will depend on the temperature of your kitchen and also how many batches you are doing. A big tub of dough ferments faster and will take longer to cool in the refrigerator, so keep that in mind. If you are just doing the single recipe, it will probably be closer to the 6 hour mark.
- Warmer kitchen: closer to 5 hours
- Cooler kitchen: closer to 6 hours
Go by the dough rather than the clock. It should be nice and jiggly and about 50–75% bigger. Since the dough will have a second rise tomorrow, don’t worry about getting the timing exact.
Once bulk fermentation is complete, place the entire container of dough into the refrigerator for a cold proof overnight.
You don’t need to transfer the dough to another container—just cover whatever container you used for mixing and put it directly into the refrigerator.
4. Divide and prepare the pans
The next day, divide the cold dough into two equal portions, about 472g each.
Generously oil two 7 x 11-inch pans with 20 g of olive oil each.
These are my favorite pans for this recipe! Super non-stick and the perfect size.
Place one portion of dough into each pan and gently turn the dough through the olive oil, coating both sides.
Let the dough rest at room temperature for approximately 20–30 minutes to take some of the chill off.
5. Stretch the dough into the pans
Once the dough has warmed slightly, use your hands to gently stretch it toward the edges of the pan, similar to stretching pizza dough. It works best if you pick it up and transfer it back and forth between your hands letting the weight of the dough stretch itself as you hand it back and forth.
The dough will want to pull back into itself at first. That’s okay. Give it some time to relax and gently continue stretching until it fills most of the pan.
Don’t worry if it doesn’t completely reach the corners right away.
6. Second rise
Cover the pans to prevent the dough from drying out. Reusable shower caps work great for this, and I’ll link the ones I use below. Plastic wrap would work great as well 👍.
Allow the dough to proof at room temperature until it is very bubbly, jiggly, and well-risen.
For me, this usually takes around 4 hours, but your timing may vary depending on the temperature of your kitchen.
You’ll know it’s ready when:
- You see lots of bubbles throughout the dough
- The dough is very jiggly when you move the pan
- The dough has risen just about to the top of the pan
- You may even see areas that are slightly domed above the rim
Go by the dough rather than the clock.
7. Add your toppings
Once the dough is fully proofed, add whatever toppings you like.
My favorite combination is four cheeses with a little garlic powder and fresh jalapenos, but you really can’t go wrong here.
Before baking, after you have put all your toppings on, gently dimple the focaccia with your fingertips.
You don’t want to completely deflate all those beautiful bubbles. Just press your fingers into the dough enough to create those classic focaccia dimples.
8. Bake
I bake my focaccia in my Pico Plus with the top and bottom heat set to 220°C / 428°F. For your kitchen oven 425°F is perfect.
Bake for 11 minutes, then rotate the pans front to back since the back of the oven tends to cook a little warmer.
Continue baking for another 12–13 minutes, or until the focaccia reaches your desired level of golden brown.
9. Remove and cool
Remove the focaccia from the oven and carefully flip it out of the pan.
These pans are wonderfully nonstick, so the focaccia should release easily.
Allow it to cool before slicing and enjoying.
You should end up with a beautifully crisp, olive-oil-coated bottom and a soft, airy, bubbly interior.
A Few Tips for Great Sourdough Focaccia
Don’t panic over the wet dough. This is supposed to be a very wet dough when you first mix it. The stretch-and-fold process is what helps build its strength.
Don’t rush the second rise. The dough should be visibly bubbly and jiggly before you bake it. If your kitchen is cooler, it may take longer than four hours.
Use plenty of olive oil. That olive oil in the bottom of the pan is what helps create that delicious crispy crust.
Experiment with toppings! Focaccia is basically a blank canvas. Keep it savory with cheese, garlic, herbs, and vegetables—or go completely rogue and make a sweet version.
Continue Your Sourdough Journey
👉 How to Get a Better Rise in Sourdough Bread
Discover the simple changes that can dramatically improve oven spring, loaf height, and crumb structure—without changing your recipe.
👉 Simple Farmhouse Sourdough Bread Recipe
Learn the full beginner-friendly process for mixing, fermenting, shaping, and baking sourdough bread.
👉The Double Feed Method: My Sourdough Starter Prep Routine
A simple two-feeding method to get your starter active and ready when you need it.
If you try this recipe, I’d love for you to leave a rating below ⭐⭐⭐⭐⭐— it helps others and supports my small bakery.
Sourdough Focaccia
Soft, bubbly sourdough focaccia with a crispy, olive-oil-coated bottom. This recipe makes two 7 x 11-inch focaccias and uses an overnight cold proof for added flavor and easy handling the next day.
Servings: 2 Focaccias
Equipment
- 2 7 x 11 baking pans my favorite ones are linked
- 1 mixing bowl
Ingredients
Dough
- 50 grams active sourdough starter
- 20 grams honey
- 375 grams water
- 500 grams bread flour
- 9 grams salt
For the pans
- 40 grams olive oil (20g per pan)
Toppings
- Your choice of toppings, get creative 😉
- My favorite: 4-cheese blend, garlic powder, & fresh jalapenos
Instructions
- Mix the dough: Add the sourdough starter, honey, water, flour, and salt to a bowl or dough container. Mix until all ingredients are fully incorporated. The dough will be very wet at this stage, but don't worry—it will become stronger and more cohesive as you work with it.
- Stretch and folds: After mixing, perform 3-4 sets of stretch and folds, approximately 30 minutes apart. Grab one side of the dough, gently stretch it upward, and fold it over itself. Rotate the bowl and repeat around the dough. The dough should become smoother and stronger with each set.
- Bulk fermentation: The total bulk fermentation time is approximately 5–6 hours, including the time spent doing your stretch and folds. After completing the 3-4 sets of stretch and folds, leave the dough undisturbed to continue fermenting. A warmer kitchen may take a total of 5 hours, while a cooler kitchen may take closer to 6 hours. Go by the dough rather than the clock. The dough should be nice and jiggly and about 50-75% bigger. Since the dough will have a second rise, don't worry about getting the timing exact.
- Cold proof: Once bulk fermentation is complete, cover the container and place the entire container of dough in the refrigerator to cold proof overnight.
- Divide the dough: The next day, divide the cold dough into 2 equal portions(about 472g each). This recipe makes two 7 x 11-inch focaccias.
- Prepare the pans: Add 20 g of olive oil to each 7 x 11-inch pan. Place one portion of dough into each pan and gently turn the dough through the olive oil, coating it on both sides.
- Let the dough warm: Allow the dough to rest at room temperature for approximately 20–30 minutes so it can warm slightly and relax.
- Stretch into the pans: Using your hands, gently pick the dough up and stretch it, similar to stretching pizza dough. The dough may want to pull back at first. Give it a little time to relax and continue gently stretching until it fills most of the pan.
- Second rise: Cover the pans to prevent the dough from drying out. Let the dough proof at room temperature until it is very bubbly, jiggly, and well-risen. This usually takes about 4 hours for me, but the timing will vary depending on your kitchen temperature. The dough should have risen almost to the top edge of the pan when it is ready. If you want to speed this part of the process, you can put the pans in a warm place, such as the oven with just the light on. But keep an eye on it, because it can get pretty warm in there.
- Add toppings: Add your desired toppings. Before baking, gently dimple the focaccia with your fingertips. Don't completely deflate the dough—just press your fingers into it enough to create the classic focaccia dimples.
- Bake: Preheat your oven to 425°F (220°C). Bake for 11 minutes, then rotate the pans front to back. Continue baking for another 12–13 minutes, or until the focaccia is beautifully golden brown.
- Remove and cool: Remove the focaccia from the oven and carefully flip it out of the pan. Allow it to cool slightly before slicing and enjoying. The finished focaccia should have a crispy, olive-oil-coated bottom and a soft, airy, bubbly interior.
Notes
- The 5-6 hour bulk fermentation includes the stretch-and-fold time.
- Fermentation times will vary depending on the temperature of your kitchen.
- Don’t rush the second rise. Look for a very bubbly, jiggly dough rather than relying solely on the clock.
- Feel free to experiment with toppings! This focaccia can be savory or even sweet.
2 responses to “Sourdough Focaccia”
-

Amazung! We really enjoyed it, and the timing is right on for a glass pan.Suggestions on storage? Likes not much left over, but there’s only 2 of us! Made the one pan recipe.
-
Awesome! I’m glad you liked it. I like to store mine in a bread bag on the counter. It usually keeps well for about 4 days.
-


Tags: Recipes

Leave a Comment